Wild Rune project
What is this project about?
This project is about learning houdini and getting used to the layout and getting back in touch with it since my last project No Noise.
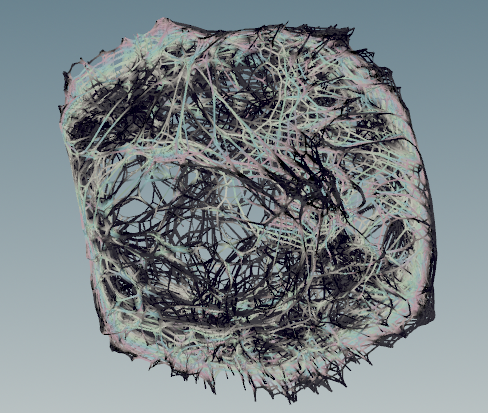
This time I saw a cool effect in Arcane season 2 where there was this sphere that look all lovecraftian and magical.
So I decided to try re-create that in Houdini with the help of an abstract tutorial from Houdini self on their website.
Project date: December 2024
Project duration: 1 week
Development Team: Solo project
Engine: None
Software: Houdini
Programming language: Node system
You can watch the video below to see my final product
My role & contribution in this project
Recreating the wild rune from Arcane season 2

I looked at the movement & color from the reference to get an idea how this would look in my final product. So I with the help of Houdini's own tutorial I remembered how the program worked and got used to the layout & how to move the camera. Then I started by adding a circle to my scene, since the base form of the wild rune is a sphere.
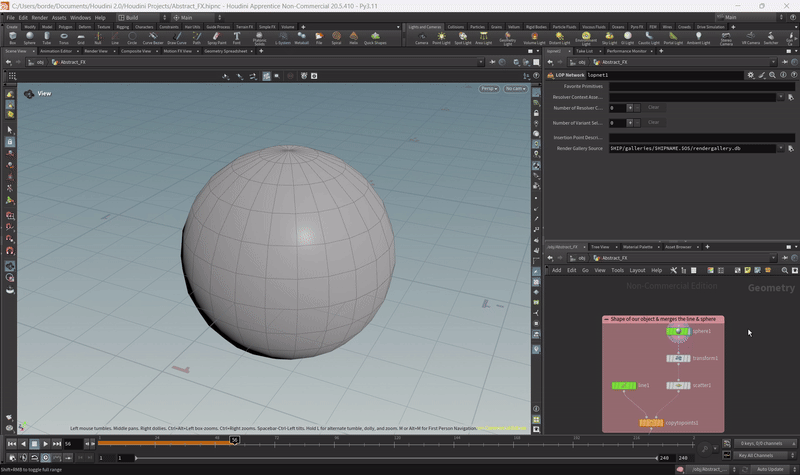
I then added a transform node to scale down the Y to 0.5, giving it a squished sphere look. Then I added a scatter node which would replace my sphere with a sphere form of points. Then adding a line node and combining that with the scatter node would put a line on all my points of the sphere.
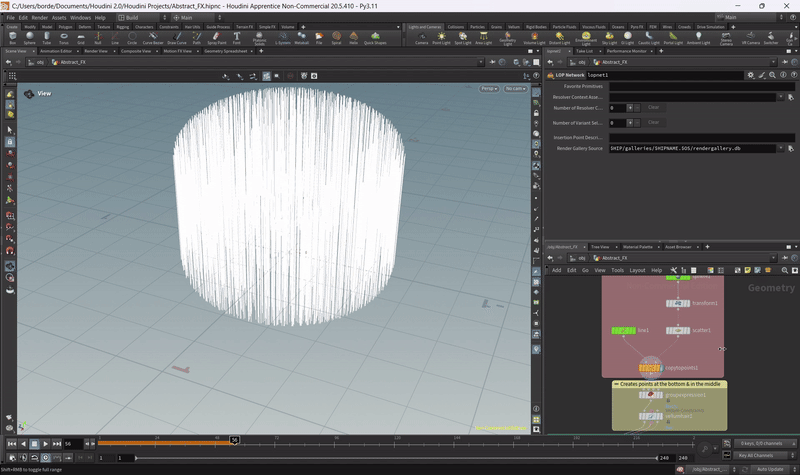
By adding a group expression node it creates points at the bottom of the line. Then I added a vellum hair node so that all the lines had points above the bottom. With the help of another node I can create them to be like hair.
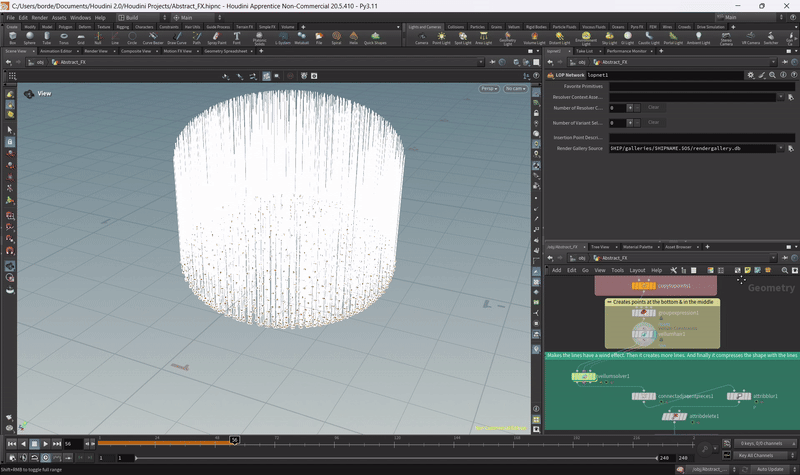
I then added a vellum solver which made all the lines like hair. Connecting the vellum solver to the connect adjacent pieces node would add more points creating more hair. Then I added the attribute blur which would make the hair blurry and compresses it into a round shape. As the final step of creating this simulation I added color to the effect, using multiple colors to make it look as close to the wild rune as possible.

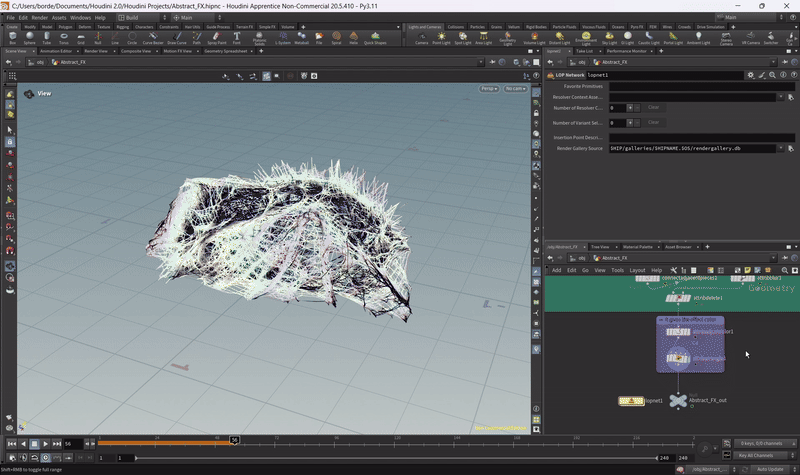
I then created a network in which I imported my scene and added a background color. Then I added a camera & render settings, creating the final product you see in the video above.
Retrospective
This project was a lot of fun, I love creating simulations from stuff I love such as Arcane.
Although I did have some trouble with rendering the video.
I didn't know you were not able to render out an mp4 on your laptop on the free version of Houdini.
So I decided to render it out in MPlay and then record my screen to get the footage.
The tutorial from Houdini helped out alot, since I always have difficulty trying to see in my head how something could be done.
But I'm getting better at it, so long as I make simulations, fx ect from movies, series and more.
Houdini is a difficult program to learn, but the results you get are amazing!
Can't wait see to what I'll make with it in the future.